

|
Autumn is almost upon us and as the last days of Summer try to cling on it is time to gather any produce you may have grown and put it to best use.
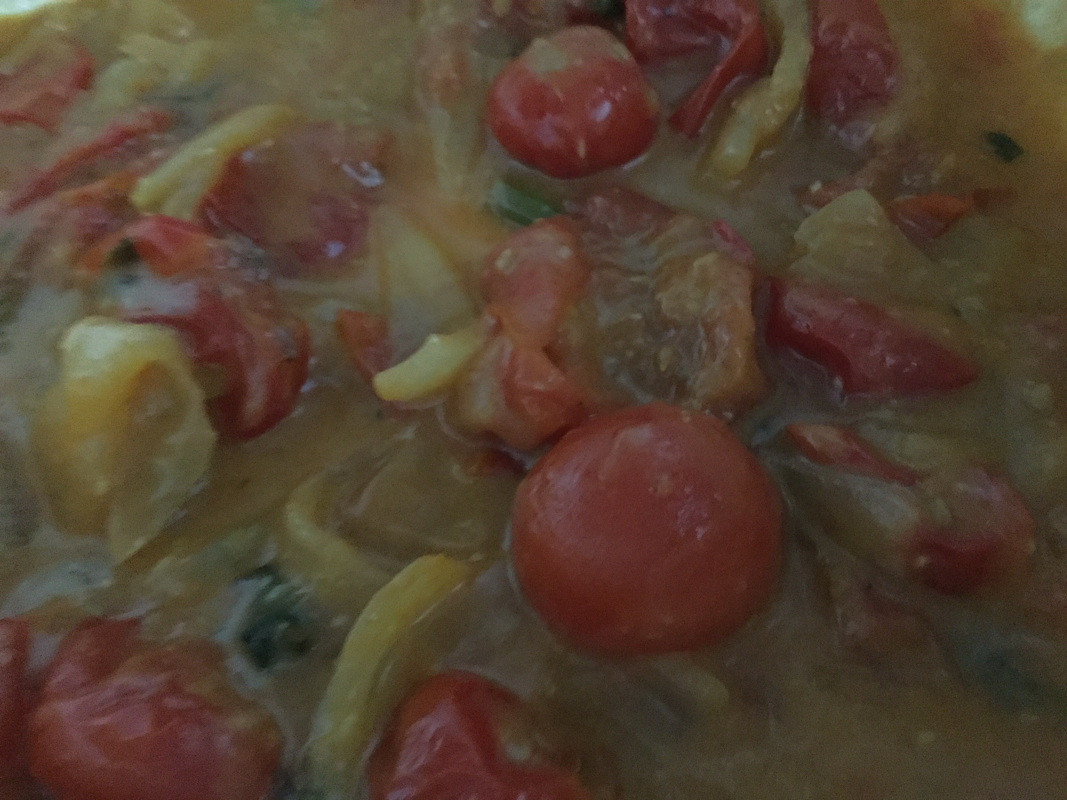
After glorious weather we have a lot of plump ripe tomatoes and some celery still growing, but indoors. The nights are drawing in and some days are much cooler so moving our celery indoors was a must. This recipe for a chunky tomato soup is quick easy and flexible. It will make use of your home grown produce when it is fresh and the attitude comes from what seasoning, herbs or spices you may choose to add. You can add, take away or edit as long as the core ingredient of tasty tomatoes remains. I used - 3 basic white onions, sliced A mixture of ripe cherry and plum tomatoes grabbed from our small garden Vegetable stock A stick of young celery, leaves included Chopped basil, homegrown A splash of milk A couple of spoonfuls of olive oil Seasoning to your taste, mine was some garlic salt A splash of soy sauce Spoonful of flour Put the oil in a pan over a low heat. Peel then chop or slice the onions roughly and add to the warm oil. Add a spoon of flour to the mixture stirring well. As the onions simmer for around 10 - 15 minutes wash and chop the tomatoes into chunks. I left a couple of small cherry tomatoes whole. Add the chunky tomatoes to the pan. Wash the celery, cut and add to the pan. As my celery was a young slender stalk I cut it with large scissors straight into the pan and included the leaves. Add vegetable stock and a splash of milk. Simmer for between 10 and 20 minutes. Check the taste adding more seasoning if needed. If too acidic for your taste you can add a little sugar. Serve topped with grated cheese. Add a chunky slice of bread or toast for a more substantial meal. BUT be aware it is quite a filling soup simply served on its own.
0 Comments
 Try alternative green vegetables Smoked Haddock with poached egg is a reasonably priced traditional English dish packed with healthy options. It will not break the bank but it will provide healthy nourishment. Best of all it is easy to cook.
There are various ways to cook the fish and the egg but here is how I cook this meal adding new potatoes and peas. It offers perfectly cooked fish and lovely poached eggs with soft runny yolks. The Potatoes Wash and halve the amount of new potatoes desired. There is no need to peel the potatoes simply pop them into a pan of slighted salted water and bring to the boil. Simmer for around ten minutes so the potatoes are par boiled. The Smoked Haddock While the potatoes are cooking put your oven onto a medium heat. Take a baking tray and some kitchen foil placing each fillet of smoked haddock in a generous sized piece of kitchen foil, big enough to cover the fish and a portion of potatoes. Add a generous knob of butter onto each piece of fish. You can use a low fat option spread including a margarine as long as you ensure it is suitable for cooking. Combine the two When the potatoes are slightly softened drain and add to the fish. Divide the potatoes between each piece of fish - into portion size. Sprinkle with black pepper and seal each packet. Add the packets to the baking tray and cook in the centre of a medium heat oven for about 15 minutes. When the fish parcels are ready there should be a lovely aroma coming from the oven and the fish should be translucent and flake easily. While the fish is cooking Put two pans of water on the hob to boil. One will be to add frozen garden peas to for just a few minutes before serving the dish. If you are using fresh garden peas cook in your usual way. They will take a little longer. The other pan is for the eggs One egg per person is usually sufficient but you can serve two each if preferred. Crack the eggs onto a small plate ensuring they are separate and that the yolks do not break. The water in the egg pan should be a couple of inches deep. When the water is boiling gently slide the eggs, one at a time into the hot water. Reduce the heat slightly and after two minutes turn it off. If you want poached eggs with soft runny yolks remove the pan from the heat and then the eggs from the pan after one to two further minutes. Gently remove the eggs using a slatted spoon utensil draining thoroughly. Serving this meal While the eggs are quickly cooking take the baking tray from the oven and place each fish and potato parcel on each plate. This means the eggs can be placed straight on top of the cooked fish. Place the peas at the side of each plate and serve with bread and butter also if you prefer. You can cut out the peas and potatoes if you want to. I like a splash of apple cider vinegar and ground sea salt on my meal while my husband likes brown sauce. The butter however means sauces are unnecessary and simply down to individual taste. This meal is easily sourced and is a light healthy non-meat option. Once you have mastered the basics of this meal get adventurous and mix it up.  Full list of Ingredients
How to make the cake
For the daffodils and icing you will need
How to make the daffodils
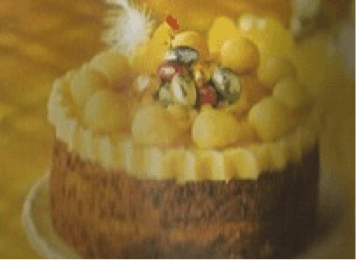
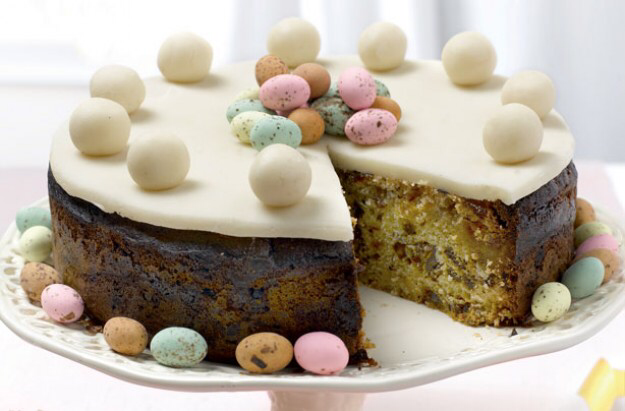
Serves 12 Ready in 1 Hour(s) 10 Minutes Each serving of this recipe contains 633 calories The sugar is rated HIGH The fat is rated HIGH The saturated fat is rated HIGH Salt is rated at MED Source: Asda recipes  We have some great recipes for the Easter festivities. Asda in the U.K. also has some great Easter recipes and here are our favourites. Bear in mind the recipes may include products sold at Asda that are available under a generic name elsewhere.
Egg shaped Easter Biscuits You will need:
More Easter Recipes: Classic Easter Simnel Cake Daffodil Easter cake Hot Cross Buns
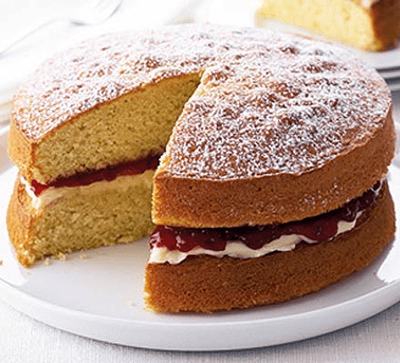
Simnel cake is the traditional name for a fruity, spicy cake eaten at Easter. You could of course choose to bake it and eat it at any time of the year.
It is easy to make, and really just a variation on plain fruit cake. Ingredients 6 ounce butter, or margarine if preferred 6 ounces of soft brown sugar 3 eggs lightly beaten 8 ounce of self-raising flour, sieved 1/2 teaspoon of ground cinnamon 1/2 teaspoon of ground nutmeg 4 ounce sultanas 12 ounce currants 2 ounce ground almonds For decorating the cake 2 x 8 ounce packets of almond paste, or make your own. 12 tiny Easter egg sweets selecte your favourite type. These can be chocolate or marzipan balls rolled into an egg shape. Preparation time 30 minutes Baking time 21/2 hours Oven setting 350 degrees F, Gas mark 4 Method
Combine 10 ounces of ground almonds with 10 ounces of caster sugar. Mix into a stiff paste, with juice of half a lemon and one large egg. Note: Adjust quantities as necessary Try the following recipes also; http://www.goodtoknow.co.uk/recipes/441855/Mini-eggs-simnel-cake  An Old English nursery rhyme relates to a food still on sale today, Hot Cross Buns.
Hot cross buns were sold by street-sellers, around the nineteenth century, to the cry of "Hot cross buns!" Hot cross buns! Hot cross buns! One a penny two a penny - Hot cross buns If you have no daughters, give them to your sons One a penny two a penny - Hot cross buns They cost a great deal more than a penny these days but you can still buy packaged buns from supermarkets fairly cheaply. These buns can be warmed under a grill, in a conventional oven or zapped in a microwave but what about making your own though and eating them warm straight from your oven? Ingredients
For the yeast liquid you will need:
Preparation time 25 minutes Cooking time 15 to 20 minutes Oven setting 425 degrees F or Gas mark 7 Method
To Glaze Boil 2 tablespoons of milk and 2 of water. Stir in 11/2 ounce sugar, boiling for two minutes. Brush the hot buns twice with the glaze. For a more defined cross on the buns Place two strips of short crust pastry onto the buns after glazing and before baking The timing of Easter varies each year. In 2017 it is in April but some years it is early and in March. Hot cross or Easter buns are already on sale February 2017 and why not? In some ways they are spiced up teacakes and perfect for a snack warm, cold, grilled or toasted. Served with lashings of butter when the buns are hot or even some cheese they are so easy to make why not give them a try.  March 5 2019, is Pancake Day in the UK
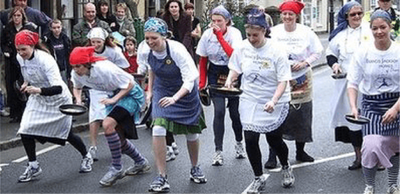
Background In February we celebrate Shrove Tuesday, or as it is also known in the UK, Pancake Tuesday. This is not a tradition as widely celebrated as in the past but many families still join in the fun. However, behind the fun is a religious holiday. Shrove Tuesday is the last day of indulgence before Ash Wednesday and the period of Lent begins. On Shrove Tuesday in the distant past the last food indulgences were used up in pancakes. Shrove Tuesday falls somewhere between 2nd February and the 9th March each year, depending upon which date Easter falls for that year. For more than a 1,000 years Shrove Tuesday has traditionally been a day for Christians to confess their sins. Shrove is actually an old word for Shrive meaning to confess all sins. After these were absolved by a priest the period of Lent began. Some UK Christians even today will give something up for Lent. It could be chocolate or beer or any food or drink. It is usually something which they enjoy or else there is no point. The pancakes were the last treat before the frugal period of Lent and in the past it was often eggs, milk and butter that were omitted from a person’s diet during Lent. Pancakes were a great way to use up household stock, which otherwise would waste. Pancake memories As a child, brought up in a religious Christian home, pancake Tuesday was a mixed bag. We lived in a tiny terraced house in 50s post-war England. The kitchen was minuscule. I have fond memories of my Mum on Pancake Tuesday though. My brother and I would sit at the table both trying to consume as many pancakes as possible. Mum would be in the kitchen for ages. Having mixed a large bowl of pancake batter she would proceed to make one pancake after another so we could eat them hot straight from the pan. Of course expert pancake Mums on Shrove Tuesday have to toss the pancake in the pan. This takes nerves of steel. I have never quite managed it as I tend to dither and then turn the pancake with a spatula. Mum however was fearless. Up would go the pancake in the air. Most of the time the pancake landed perfectly back in the pan, on the correct side. Occasionally though she would slightly miss and half the pancake would slip to the floor. Rarely she would miss altogether and the pancake would land on the floor and be binned. Each year at least one pancake would hit and stick to the low kitchen ceiling. Looking back I do think some of this was my Mum's humour and done to entertain us kids. The kitchen ceiling was not high so perhaps it was accidental but I shall never know now. Thoughts of pancake Tuesdays of the past have left me wondering about today's children. These days you can buy readymade frozen pancakes which cook in the microwave in seconds. Alternatively you can by pancake mixture. My poor Mum must be turning in her grave. How to make the pancakes Making pancakes from scratch though is quite easy and cheap. Of course some will taste better than others but the mixture is easy and simple to make: The ingredients and how to make:
Ready to cook? Place the frying pan over a reasonable heat on your hob. Add a knob of butter or oil if preferred to the pan. Make sure that the fat has melted and is hot before you add the pancake mixture. If there is too much fat drain away the excess. Spoon or ladle a spoonful of the pancake mixture into the pan, swirling the pan around as you do so. This ensures that the pancakes are thin but that the pan is evenly covered. It will only take a minute or two to brown the pancake on one side and then you will need to flip, toss or turn your pancake over. Make sure that you ease the pancake away from the pan before you attempt any of these. Go on give it a whirl and toss the pancake high into the air. I dare you! If you want to make lots of pancakes and keep them warm to serve together you can. However you cannot beat fresh hot pancakes straight from the pan. You can choose to eat the pancakes plain or add a filling As children syrup or golden treacle was the favourite filling. Some people prefer jam and even cream. Others prefer simply a squeeze of lemon juice. You can make a savoury filling but of course you will need to adjust the ingredients. You will not want to add sugar for these. So what about you? Do you enjoy Pancake Tuesday? Will you join in the celebration this year and next? There are still many pancake races around this lovely eccentric country of ours, namely the UK. Take a look at the YouTube links below and have fun. It seems it is not just we eccentric English who run a race whilst trying to toss a pancake in a pan after all. http://www.youtube.com/watch?v=X1gqFlb8VS0 http://www.youtube.com/watch?v=yBlyl1GfFK4 http://www.youtube.com/watch?v=i5HK5_GsIe4 http://www.youtube.com/watch?v=7LMTmQSuV14  No bake cherry ginger crunch
If you are a novice cook, one who prefers easy recipes or just need a to create a gem of a dessert in rapid time this recipe could be for you. It uses ready-made ingredients and is a fail-safe recipe. Ingredients
Preparation time 10 minutes Cooking time 5 minutes Method Crush the ginger biscuits into crumbs. The easiest way to do this is to put the biscuits into a polythene food bag and close it tightly. Use a rolling pin to crush the biscuits in the bag. This method means no wastage nor mess. Grease an 8 inch flan tin. Melt the butter or margarine in a pan, over a low heat. Add the crushed biscuits and powdered ginger to the melted fat, mixing well. Add water to the evaporated milk until the liquid measures half a pint. Mix the cornflour and sugar with a little of the milk and water mixture. Bring the rest of the milk and water to the boil and pour over the cornflour mixture, stirring well as you do so. Return to the pan, adding the vanilla essence. Bring back to the boil stirring as the mixture thickens. Cover the ginger base with half of the cherry pie filling and then top with the cornflour mixture. Top the lot with the rest of the cherry pie filling. Result: A tasty dessert with a difference. The ginger adds a touch of spice and the cornflour mixture prevents a dry taste. All in all a winner. In you do not like cherries try a blackcurrant or blackberry pie filling. Alternatively stew fresh in season fruits. Note: Easy conversions for this traditional recipe to metric can be found here.  Don't know what bangers and mash are? Then the odds are you are not English or getting on in years.
Bangers and Mash, is a traditional, good value, warming meal, that is quick to prepare and delicious to eat. In plain English, it is a traditional British meal consisting of sausages and mashed potatoes. This meal dates back to the early 1900s. Of course at that time the ingredients of the sausages would have varied from today. In the past the sausage skins were generally made from an animal's cleaned intestines. Today more sausages have artificially made skins which contain sometimes suspect meat. As Bangers are sausages, and Mash is simply mashed potatoes, it should be easy to get this recipe right, shouldn't it? If only life were that simple. As with all recipes, the food is not always as tasty as it should be. Much will depend on the quality of the sausages, the means of cooking, the variety of potato, the gravy and so much more. The perfect potato, or spud as the British call them, for mash. One of the best varieties of potato, for making great Mash, is the Nadine. It has the right amount of moisture and taste, to make perfect mashed potatoes. However, when we British make a cheap mid-week meal of Bangers and Mash, almost any potato or sausage will do. However, if you want your Bangers and Mash to rise above the crowd, buy the right potato for the job. Perfect Mash Make sure that you cut the potatoes into regular sized pieces. This guarantees an even cook. Rinse the peeled and chopped potatoes, under cold water, and then place in a pan of cold water. You will need enough water to cover the potatoes. Years ago, this water was always salted, but these days it is down to personal taste and choice. When the pan of potatoes has boiled, cover with a lid, and simmer for about 15 to 20 minutes. The timing depends on the variety of potato, the size of the chunks of potato and the quantity. Drain the potatoes thoroughly and turn into a bowl for mashing. Mash using your preferred methods. The Bangers Sausages, or Bangers, are less popular in the UK these days. They are generally classed as having poor nutritional value. For example, cheap sausages may have a slightly suspect source of meat and too much cereal. Sometimes cheap bangers have tough chewy pieces of gristle in them. The contents may also include mechanically retrieved meat, which is not good for you. The taste and nutritional value of your meal will be improved if you buy good quality sausages. Bangers are usually pork, beef or a mixture of pork and beef. Nowadays, you can buy vegetarian or turkey sausages, but neither of these will make traditional Bangers and Mash. Sausages can be fried reasonably quickly, but they taste better if cooked in the oven or in a grill pan on the stove. This way you will not need to add any fat, as they will cook in their own juices. If you put the bangers in the oven, as the potatoes begin to simmer, all the food should be ready to eat at the same time. Bangers cooked in the oven with onions, and then an added gravy, make lovely Bangers and Mash. Bangers and Mash cooking tips The mashed potato should not be sloppy and wet, nor should it be too dry. Perfect mashed potato has a little added milk, butter, salt and pepper. The amounts depend on your taste. The bangers are traditionally stuck into a heap of mashed potato. Pile the mash on the person's plate. Stick the bangers in the mash vertically. Cover with lashings of onion gravy. Overall This dish has universal appeal. Children and adults alike, tend to love bangers and mash. It is quick and easy to shop for, prepare and cook. The bonus, of course, is that it is also a tasty dish. You can add your own little touches, if you want to, but god old-fashioned bangers and mash was a simple dish. It helped to cheaply provide sustenance for poorer families and has remained a winter favourite, for all ages. http://www.simplyrecipes.com/recipes/how_to_make_homemade_sausage/  Like yogurt? Like really fresh yogurt? If so why not make your own?
We had a yogurt maker for many years but stopped using it sometime ago. It was cheap enough to operate but the yogurt always had an unpleasant gloopy sort of texture to it; well it did to me. Having seen adverts for the Easi-Yo yogurt-maker on QVC I was tempted but never got around to purchasing the kit. Then a little before Christmas I spotted one of the makers in Wilko; it had a variety of flavoured sachets of the powder to make the yogurt also available and so I thought what the hell. Essentially the Easi-Yo yogurt-maker works like a flask. They are available in a range of colours but I purchased a white one which also has some red on it. They are made out of durable plastic. Inside there is a loose stand and a pot to make the yogurt. You simply add the amount of water, usually 500 mils, to the inner pot before adding the yogurt powder to this. Screw on the lid of this inner pot then give it a really good shake. Add a little more water to the recommended fill line and re-shake. Now boil a kettle full of water to add to the outer flask. Make sure it is above the inner stand but not too high. That way when you add the inner pot full of the yogurt mixture the hot water will cover at least half of this. Replace the Easi-Yo yogurt maker lid and leave to stand for between 8 to 12 hours, or overnight. Once your yogurt is ready take the inner container out and put in the fridge to chill before eating. Hints and tips Our first attempt was still fairly runny after the 12 hours. So we had a re-think. It says use room temperature water to make the yogurt but our tap water was very cold as it was winter and drawn from outside. So for the second attempt I added a little of the boiling water, only a spoonful or two, when topping the mixture up and it worked. The product does have some information leaflets which may also help. But as a rule of thumb the yogurt will take a longer time to set in colder weather and a shorter time when it is warm. Leave the yogurt too long and it will become almost sour cream, which you may or may not want. If the yogurt is not at this stage it will keep for up to two weeks in the fridge. Easi-Yo also sell small pots suitable for storing the product but you may find them or similar cheaper elsewhere. Each sachet of the yogurt costs around £2.75 in the UK. So it is not cheap but it does contain tasty ingredients which are good for you. You only add water so the other costs are minimal. Better value multi-packs of the yogurts are sometimes available at QVC or other outlets. Overall though if you like yogurt that tastes good and is good for you they represent great value. https://uk.easiyo.com/ UPDATE: During the coronavirus pandemic this yogurt may be a good option. You do not add milk, just water. The Easi-Yo makers have been redesigned and are now more compact. |
Archives
September 2019
Categories
All
|


 RSS Feed